Plaster and Drywall Repair
Plaster & Drywall Repair
Things shift, cracks appear, and sometimes walls just don’t cooperate. Whether it’s a sneaky leak or wood expanding and contracting with the seasons, plaster and drywall repairs are a standard part of any interior painting project. Because let’s be honest - paint looks best on a smooth, well-prepped surface.
Plaster vs. Drywall – What’s the Difference?
Plaster and drywall both create smooth, paintable walls, but they have distinct characteristics.
Dense Plaster
Plaster is a dense, hard surface traditionally applied by hand in multiple layers over wooden lath or metal mesh. It’s durable and sound-dampening but prone to cracking with structural movement.
Drywall - A Gypsum Sandwich
Drywall, on the other hand, is a (relatively) modern (1940's-ish), factory-made panel composed of natural gypsum sandwiched between layers of recycled paper. Drywall really is a green product. Because of these differences, repairs require the right materials and techniques to ensure a seamless finish.
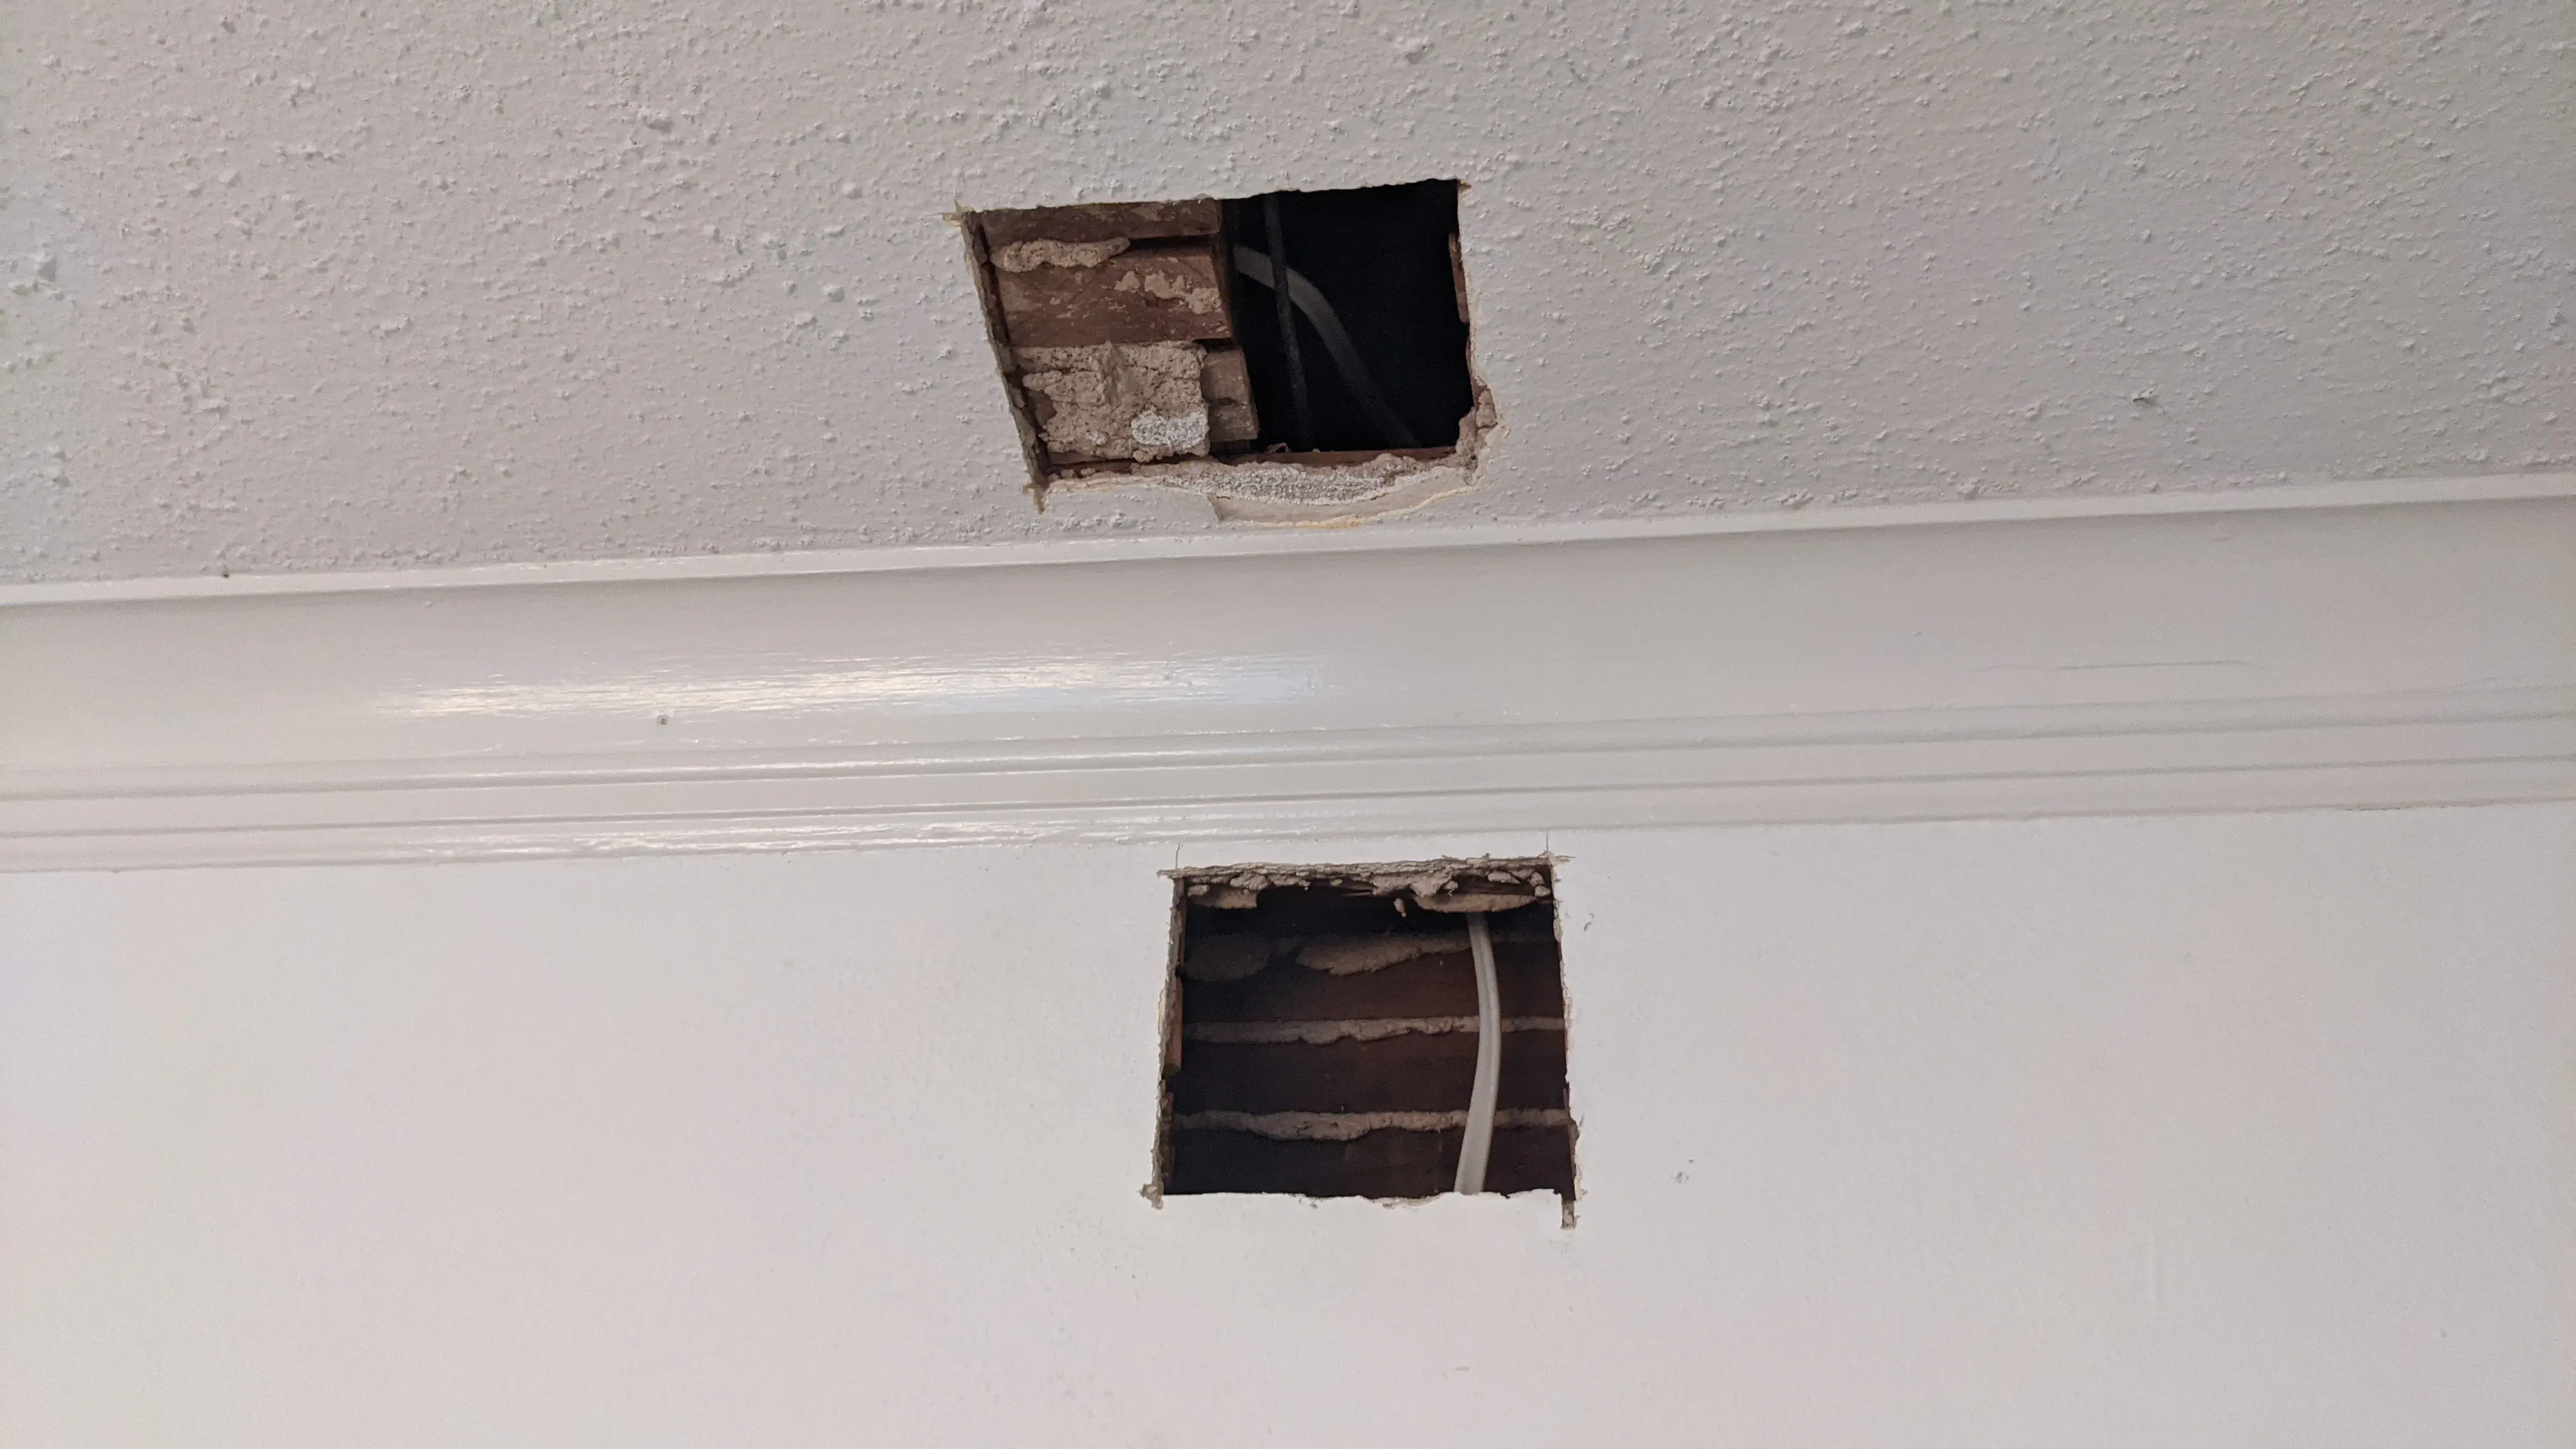
Repairing Traditional Plaster
Time-tested techniques like plaster washers, patching compounds, and bonding agents can restore damaged plaster without compromising its integrity. Often, large hole patches (say, after a plumber finishes) will involve techniques from both traditional plaster and drywall.
Excellent repair of water damaged plaster ceiling. Clear communication about project, professional workmanship.
Repairing Drywall
Drywall repairs start with secure screws and proper bracing. Setting-type joint compound provides strength and durability, while joint tape reinforces seams and prevents future cracking.
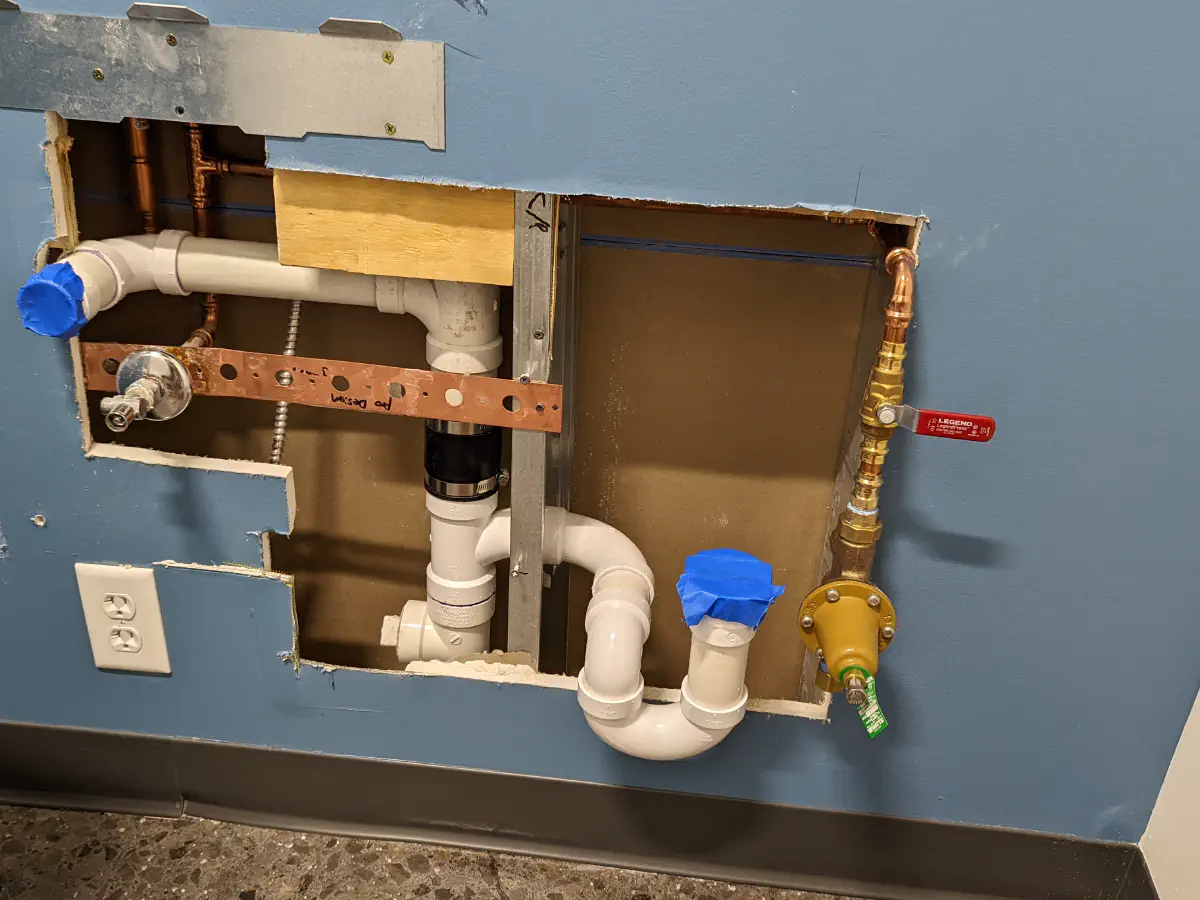
Types of Repairs – Hairline Cracks, Roof Leaks
Plaster and drywall damage comes in all shapes and sizes. Hairline cracks are common in all homes, while larger holes often come from accidental impacts or plumbing work. Water damage from leaks can lead to weakened or crumbling plaster, requiring careful removal and reinforcement before repainting.
Textures – Matching the Original Finish
A smooth patch on a textured wall sticks out like a sore thumb. Whether it’s orange peel, knockdown, or popcorn texture, repairs need to match the existing surface for a seamless look. And for older popcorn ceilings? Testing for asbestos is always a good idea before making any changes.
Cost of Plaster Repair
Plaster repair costs vary widely depending on the scope of damage, surface texture, and level of detail required. A single hairline crack over a doorway? That's pretty straightforward. A ceiling full of spiderweb cracks or an entire wall with delaminated plaster? Now that’s a different story.
In Kansas City, we’ve seen repair costs range from $50 for a simple patch to $5,000 for extensive restoration. Whether it’s a minor fix or a full-scale repair, proper prep ensures a seamless finish that looks great — just don’t count on cosmetic repairs to hold buildings together.
A wide range of crack repair and plaster products mean almost every situation can be addressed.
Plaster Repair Process
Seal the Area to Help Prevent Dust Migration
Plaster repair creates fine dust that can settle everywhere if not properly contained. We seal off the work area with plastic sheeting and zipper doors to keep the mess where it belongs.
Tape ‘n Tarp to Protect Your Possessions
Floors, furniture, and fixtures are carefully covered with drop cloths and plastic sheeting to keep dust and debris from settling on your belongings.
Firmly Fasten Loose Plaster
If plaster has separated from the lath, it needs to be reattached before repairs begin. This is done using plaster washers and screws to secure the loose areas and prevent future movement.
Nail Pops Too
As buildings settle, nail pops — small bumps where nails push through drywall or plaster — can appear. These are set back into place, secured, and properly patched.
Paper Tape Helps Prevent the Crack from “Telegraphing” Through
To prevent cracks from returning, paper tape is embedded in joint compound to reinforce the repair and prevent movement from re-exposing the damage.
Skim and Sand Smooth for a Seamless Appearance
The final step is a smooth, seamless finish. Multiple thin coats of joint compound are applied and sanded between layers to blend the patch perfectly into the surrounding surface before priming and painting.
Plaster and Drywall Terms
- Joint Compound (Mud) – A paste used to fill seams, holes, and imperfections in drywall.
- Tape – Paper or mesh material applied over seams to reinforce drywall joints.
- Sanding Sponge – A flexible sanding tool used to smooth joint compound.
- Drywall Screws – Special screws with coarse threads for attaching drywall to studs.
- Studs – Vertical wooden or metal framing members that support drywall.
- Corner Bead – A metal or plastic strip that creates sharp, straight corners.
- Mesh Tape – Self-adhesive fiberglass tape used to reinforce seams.
- Paper Tape – A traditional tape for drywall seams that requires joint compound.
- Blueboard – A type of drywall designed to bond with plaster finishes.
- Skim Coat – A thin layer of joint compound or plaster applied for a smooth surface.
- Popcorn Ceiling – A textured ceiling finish that was once popular in older homes.
- Knockdown Texture – A drywall finish where the texture is slightly flattened after application.
- Level 5 Finish – The highest-quality drywall finish, including a full skim coat.
- Plaster Keys – Small ridges of plaster that hold it onto wooden or metal lath.
- Drywall Anchor – A device used to securely attach screws to drywall.
- Lath – Thin wooden, metal, or gypsum strips that hold plaster in older walls.
- Crown Molding – Decorative trim installed at the intersection of walls and ceilings.
- Drywall Knife – A tool used to apply and smooth joint compound.
- Texturing – Applying a decorative finish to drywall using tools like brushes or sprayers.
- Plaster Patch – A repair technique for fixing small cracks or holes in plaster.